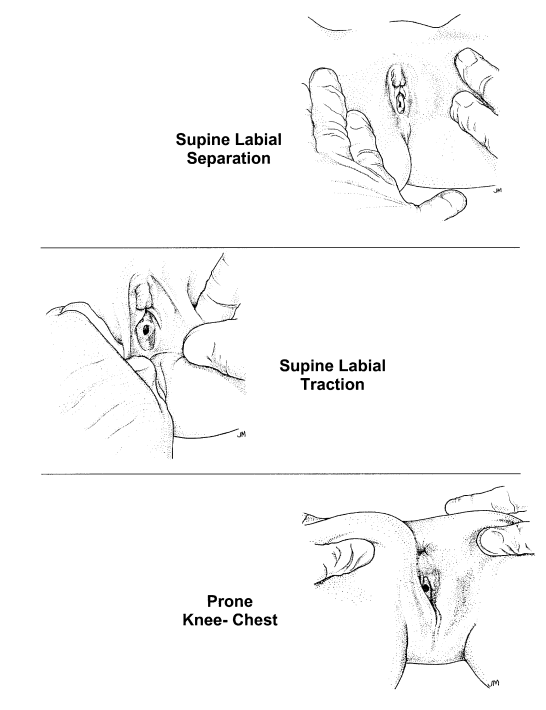
Appendix 2. Illustrations of Exam Positions and Techniques
The following video depicts a brief, simulated patient encounter. These videos are intended to demonstrate clinical skills highlighting how to interact with patients using a trauma-informed approach. Each video prioritizes addressing the healthcare needs of the patient. The video does not show the medical forensic exam in its entirety but rather highlights portions of the exam.
A complete medical forensic exam includes but is not limited to:
CONTENT WARNING: The following videos contain material that may be triggering and/or content that is challenging to view. Themes can include: sexual assault, intimate partner violence, child sexual abuse, discrimination, racism, human trafficking, incarceration, and abuse later in life.